

Be smart with basement ceilings
Advertisement
Read this article for free:
or
Already have an account? Log in here »
To continue reading, please subscribe:
Digital Subscription
One year of digital access for only $75*
- Enjoy unlimited reading on winnipegfreepress.com
- Read the E-Edition, our digital replica newspaper
- Access News Break, our award-winning app
- Play interactive puzzles
*Billed as $5.77 plus GST every four weeks. After 52 weeks, price increases to the regular rate of $19.95 plus GST every four weeks. Offer available to new and qualified returning subscribers only. Cancel any time.
Monthly Digital Subscription
$4.99/week*
- Enjoy unlimited reading on winnipegfreepress.com
- Read the E-Edition, our digital replica newspaper
- Access News Break, our award-winning app
- Play interactive puzzles
*Billed as $19.95 plus GST every four weeks. Cancel any time.
To continue reading, please subscribe:
Add Free Press access to your Brandon Sun subscription for only an additional
$1 for the first 4 weeks*
- Enjoy unlimited reading on winnipegfreepress.com
- Read the E-Edition, our digital replica newspaper
- Access News Break, our award-winning app
- Play interactive puzzles
*Your next Brandon Sun subscription payment will increase by $1.00 and you will be charged $17.95 plus GST for four weeks. After four weeks, your payment will increase to $24.95 plus GST every four weeks.
Read unlimited articles for free today:
or
Already have an account? Log in here »
Of all the lower-level and basement full-gut and remodels achieved throughout the years, only a handful have been finished with drywalled ceilings — and there’s a good reason for that.
In most homes, services mapped throughout the structure originate from the basement. And due to this, many of the joist cavities throughout the lower-level ceiling contain controls or supply lines for ventilation and water and often even electrical junction boxes, all stemming from a variety of scenarios and for specific reasons. Permanently covering these features is a big mistake.
At one job site in the Sage Creek area, the dwelling was considered a new build, only a few years old and the lower level had not been addressed at all. The bare-lumber staircase led to an entirely empty space with concrete walls along the perimeter.
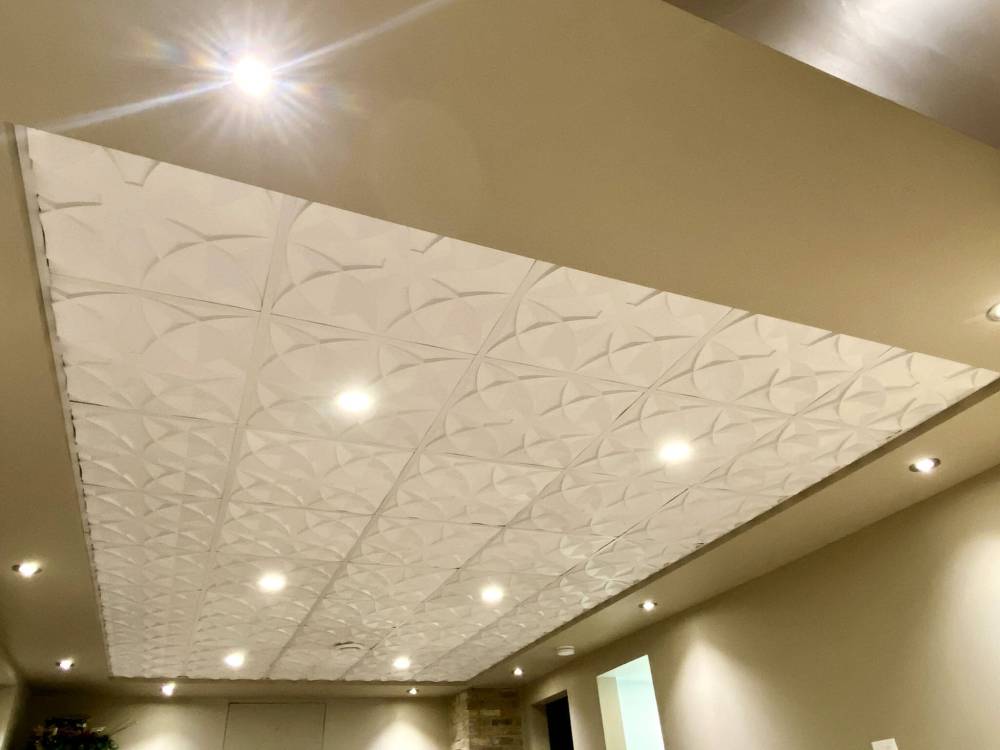
MARC LABOSSIERE / FREE PRESS
These PVC profile tiles were difficult to cut, as certain cut locations required a custom tab to prevent the tile from falling through the grid.
Eventually, the interior wall configuration was designed, and the project began to take shape. Unlike most basements that showcase shorter wall heights, this new home’s lower level boasts nine-foot ceilings. And for the most part, the services were confined to the utility and furnace rooms, thereby allowing with ease the installation of drywall along the ceilings.
For older homes, this generally is not the case. Access is required at many ceiling locations throughout the basement, which precludes the use of drywall unless you also install several tension held access panels, which can then look cluttered and unappealing.
As such, the ceiling solution of choice is often ceiling tiles, held in suspension by a grid. Suspension ceilings have come a long way in recent years, providing many style and colour options, as well as a variety of materials that make up the actual tiles.
Standard acoustical tiles are most common product, available in an array of textures. Some are flat, while others offer a reveal edge which allows the tile to “drop” within the grid creating a refined appearance. And although tiles are often available in 24-by-48-inch sizes, I prefer the 24-by-24, as they look less like an office ceiling (in my opinion).
In my own basement, I opted for a profile tile made of PVC. Admittedly, they were quite difficult to cut, and required custom tabs along certain cuts to prevent them from dropping through the grid. However, once the installation protocol was established, the PVC tiles went in rather smoothly and look truly fantastic once completed.
MARC LABOSSIERE / FREE PRESS
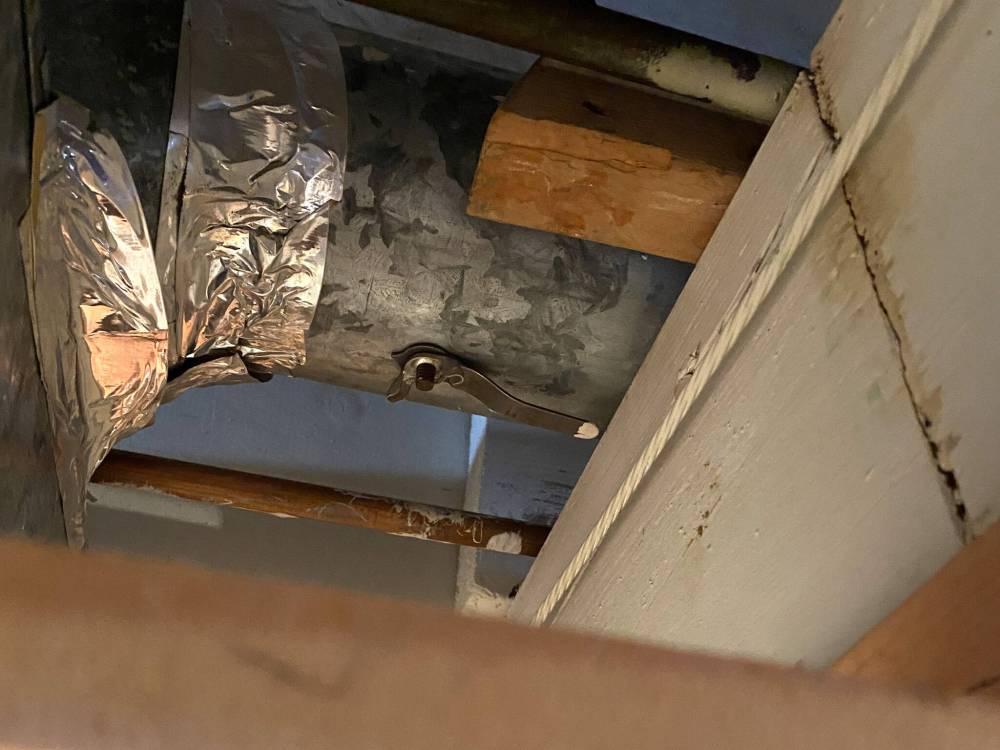
Suspended ceilings allow ongoing access for adjustments to any services within ceiling-joist cavities, such as dampers that restrict airflow within a duct.
The grid is a series of “T” brackets, whereby the longer main supports usually run parallel with the long side of the room. Cross-brackets are then installed at every 24 inches (or 48 inches, depending on the chosen tile size). The grid is held with metal wire, attached to the joists roughly two or so inches from the bottom edge of the joists. An “L” bracket is also installed along the entire perimeter of the room to hold (and hide) the ends of the grid-support sections.
Access is key
The wonderful aspect of a suspended ceiling, beyond the chosen esthetic, is the forever access to the ceiling cavities above the tiles. No matter the type of service behind the grid, any tile can simply be lifted and removed in order to access what’s behind it. Moreover, when an unfortunate event occurs such as a leaky tub trap in the main bathroom above, not only is the trap easily accessed and fixed from below, but a damaged tile can also simply be replaced.
At a current basement job site, the basement ceiling had been adorned with permanently attached 12-by-12-inch tiles, each one nailed into place. In a few places, screws had been added to prevent the tiles from drooping, which had occurred under their own weight over time.
With the old tiles removed, the new ceiling will soon be prepped for instances of suspended ceiling grids and tiles. Luckily, I was able to ascertain something the homeowners had not realized when they moved in years ago, well after the basement had been “finished” the first time.
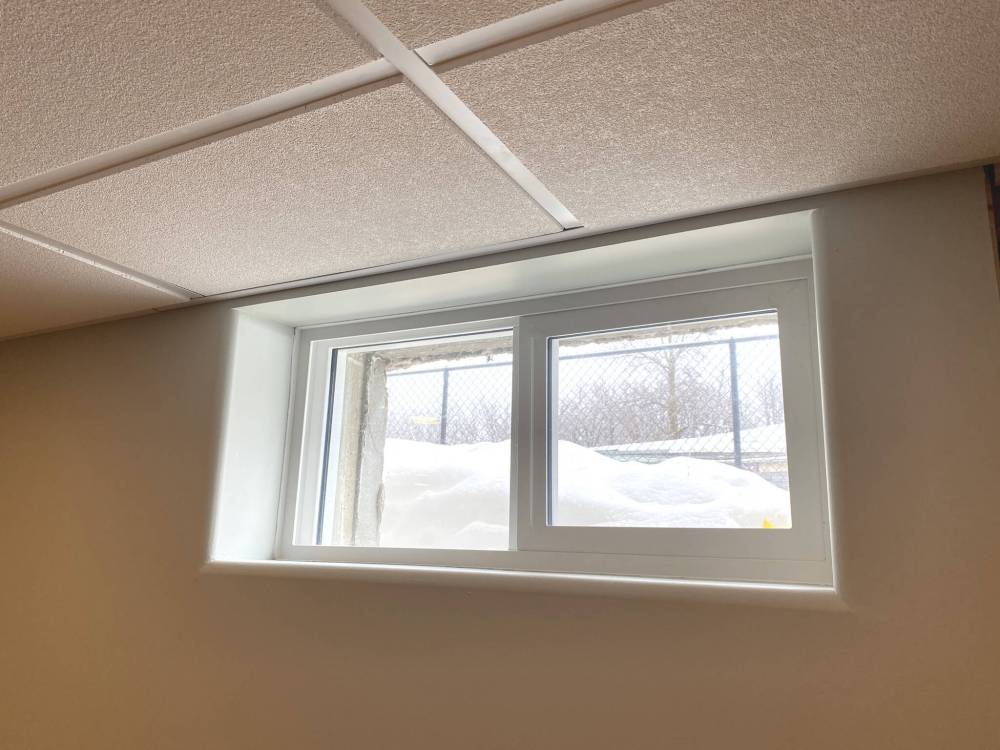
MARC LABOSSIERE / FREE PRESS
Provided a window is low enough for the suspended grid, the tiles will hover just above the clean edge of the finished window casing.
A room or two on the main floor had never really had much ventilation push from the floor vents, which made it nearly impossible to keep the room(s) warm in the winter. Moreover, nearly every duct vent downstairs exhibited the same issue — what could it have been? Removing the old tiles revealed that the previous homeowner, while “finishing” the basement, had overlooked a crucial aspect of ventilation ducting — six of the eight dampers along the main ducts were in the closed position.

A damper is essentially a round plate within the circular duct that closes off the ventilation, primarily used in unfinished basements to eliminate wasteful heating of an unused lower level, thereby directing more of the “push” of the HVAC system to the other floors of the house.
When finishing a basement, it is imperative to open every damper, so airflow can be controlled by an adjustable vent on every duct’s termination point. Once the dampers were opened (for the first time since my clients have been in this house), the cold rooms are now warm, and the basement is always cosy. No matter the services, the suspended ceiling will now provide ongoing access.
Suspended ceilings are quite easy to install, provided the grid pattern is properly mapped. In smaller rooms, the tiles can stretch from wall to wall. In larger rooms such as the main rec-room, I’ve always preferred to introduce a perimeter bulkhead upon which the L-bracket is attached. This allows desired measurements when mapping the grid, to ensure near full tiles along all outer edges. Moreover, perimeter lighting can be introduced along the underside of the boxing, along with the lights within the tile and grid itself.
No matter the size or shape of the area, there’s always a way to make it look great — pre-planning is always the key.
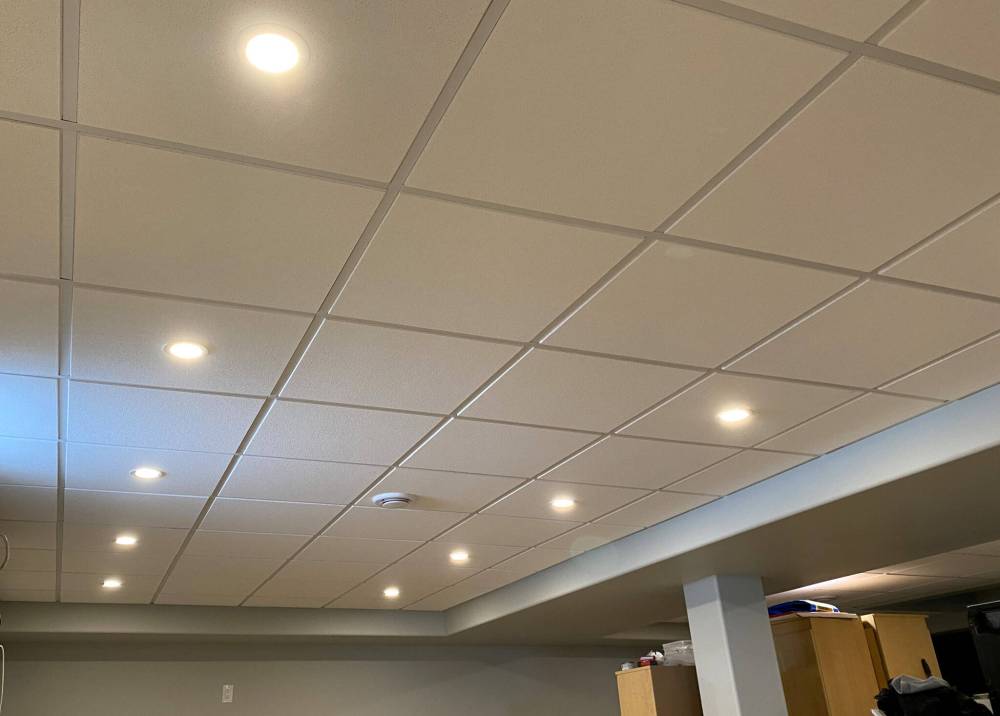
MARC LABOSSIERE / FREE PRESS
Standard 24-by-24-inch acoustical tiles with reveal edge complete this ceiling configured within boxing required due to main ducts.
RenoBoss.Inc@outlook.com