

Good fences, good neighbours
Privacy project can be done in a day
Advertisement
Read this article for free:
or
Already have an account? Log in here »
To continue reading, please subscribe:
Monthly Digital Subscription
$1 per week for 24 weeks*
- Enjoy unlimited reading on winnipegfreepress.com
- Read the E-Edition, our digital replica newspaper
- Access News Break, our award-winning app
- Play interactive puzzles
*Billed as $4.00 plus GST every four weeks. After 24 weeks, price increases to the regular rate of $19.00 plus GST every four weeks. Offer available to new and qualified returning subscribers only. Cancel any time.
Monthly Digital Subscription
$4.75/week*
- Enjoy unlimited reading on winnipegfreepress.com
- Read the E-Edition, our digital replica newspaper
- Access News Break, our award-winning app
- Play interactive puzzles
*Billed as $19 plus GST every four weeks. Cancel any time.
To continue reading, please subscribe:
Add Winnipeg Free Press access to your Brandon Sun subscription for only
$1 for the first 4 weeks*
*$1 will be added to your next bill. After your 4 weeks access is complete your rate will increase by $0.00 a X percent off the regular rate.
Read unlimited articles for free today:
or
Already have an account? Log in here »
Shortly after I sheathed a ground-level deck in composite for a homeowner last summer, I was asked the best way to increase privacy from a neighbouring property.
There were two obvious options: erect a privacy wall along the side of the deck facing the neighbours’ place, or extend the existing fence to the corner of the homeowners’ house.
Although the former was seriously considered, the homeowner opted for the latter, which came with the secondary benefit of helping to protect the family pet from unnecessary distractions.

Marc LaBossiere photos
The new section of fence was designed to match the existing fence surrounding the neighbours’ property.
Other than for neighbours’ fully fenced-in yards on both sides, my client’s house was open at both corners, with makeshift folding pet fencing in place to keep the energetic doggo in the backyard. This was preferable to “blocking” the pup’s view completely, while maintaining a set area for the dog to roam in the yard.
Because the fence along the perimeter of the one neighbour’s property cuts back towards the back corner of that house roughly 16 feet short of the corner of my client’s house, the dog gets excited every time the neighbours wander into their backyard. The homeowners decided against a privacy wall in this area, because although it would have blocked the neighbours’ coming and goings from view, the dog would still be aware of any and all movement.
So, a fence continuation was proposed — one that would match the existing design — with a cutback towards the house, and gate access from the front yard. The gate that was chosen is a pre-fab, iron gate that allows the dog to see out to the front yard, while the fence conceals the neighbours’ movements along the side of the house.
The work was scheduled for completion in one day.
For such a small project, I decided to grab the treated lumber myself to ensure I got the best picks. While I was at the lumber yard, my good friends at Fontaine Landscaping sent a crew to pre-drill the holes for the 6 x 6 posts using a nine-inch auger bit and a hand-held post-hole digger. Just as I arrived at the jobsite with the load of lumber in my flatbed trailer, the last of three holes was being completed. Having the holes pre-drilled greatly simplified the process.
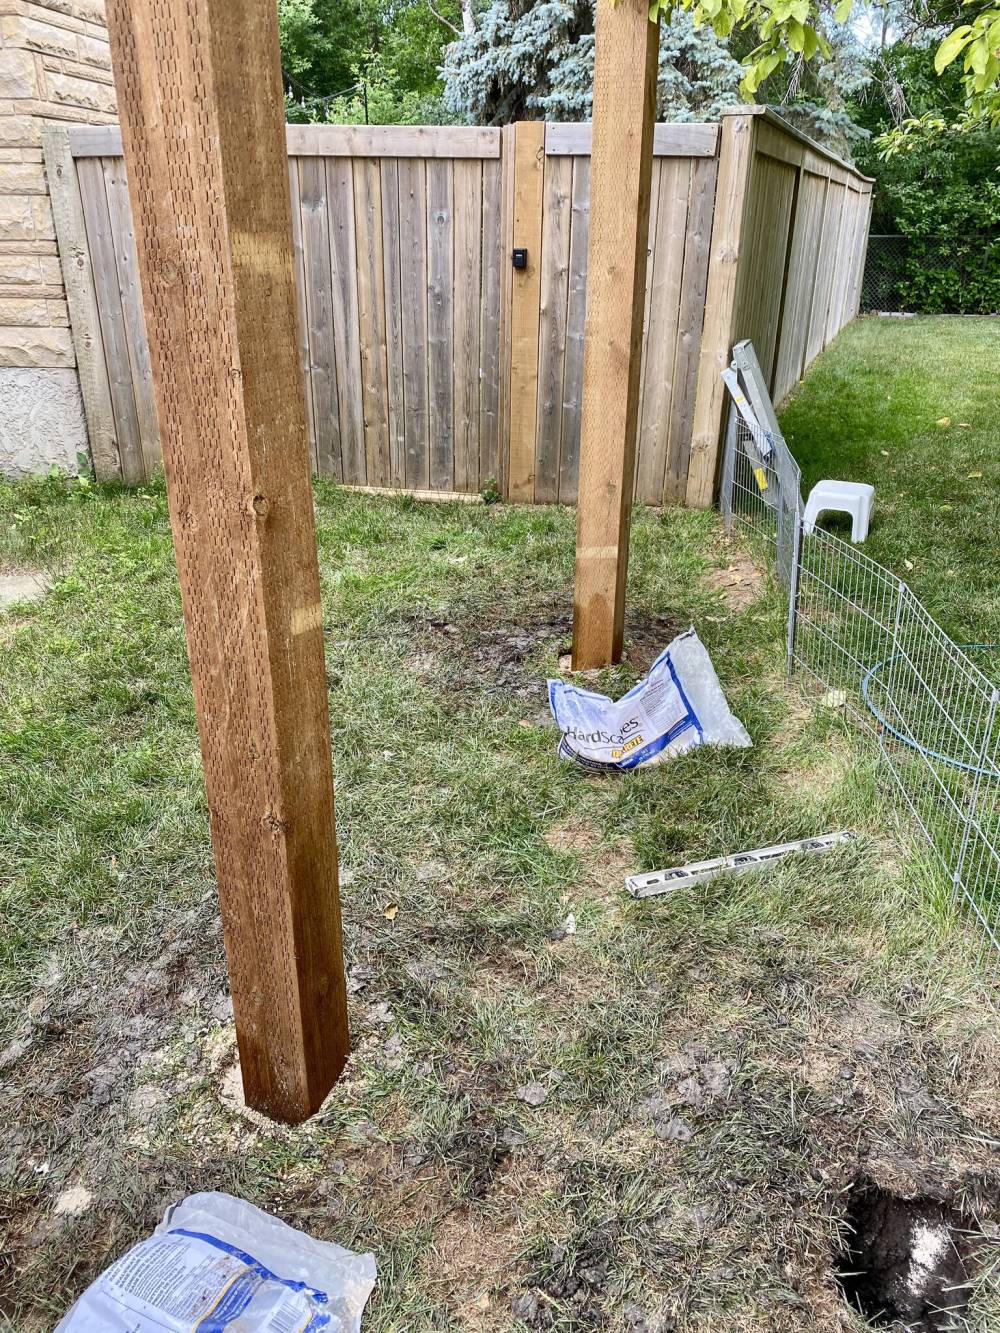
The 6 x 6 posts are set into pre-drilled holes.
The next step was setting the posts. Three 10-foot 6 x 6 posts were dropped into their respective holes, to a depth of roughly three-and-a-half feet. Quarter-down gravel was used to level each post to plumb. The gravel was packed on each side of the posts and soaked with water to compact it. With the posts set, a level-line was established and the tops of the posts were cut off. The 2 x 6 horizontal supports for the vertical 1 x 6 fence boards were then mounted between each post (and at the existing fence-line) and fastened with three-and-a-half-inch ceramic screws. A top, bottom and middle support were used to match the existing fencing, with a 2 x 8 on the flat used to cap the top.
With the supports in place, the 1 x 6 fence boards were fastened to the horizontal supports, with the bottom edge of the fence board flush with the grass. Any discrepancy along the top support was concealed with a decorative 2 x 6 on the clean side of the fence. Once all the fence sections were completed, the iron gate installation could begin.

Unlike fabricating a custom gate that fits within the gap of two posts, pre-fab gates require a precise opening to function properly. Setting fence posts is never an exact science, depending on what the auger hits as it’s drilling into the ground; the post-hole digger can easily shift due to tree roots, large rocks, etc. Fortunately, these post holes were fairly accurate, with the gate posts just slightly over the 36-inch opening recommended for the 33-inch wide iron gate. Once the hinges were secured to the gate, the latch mechanism was attached. After a few minor adjustments, the self-closing gate functioned beautifully and the project was complete.
In total, the L-shaped fence with iron gate is about 20 feet long. Although the treated lumber used for the new fence section looks newer than the older cedar fence to which it is attached, matching the design style greatly diminishes those subtle differences.
Most importantly, the new fence performs exactly as intended — it provides the sought-after privacy while concealing neighbourly activity that over-excites the dog.
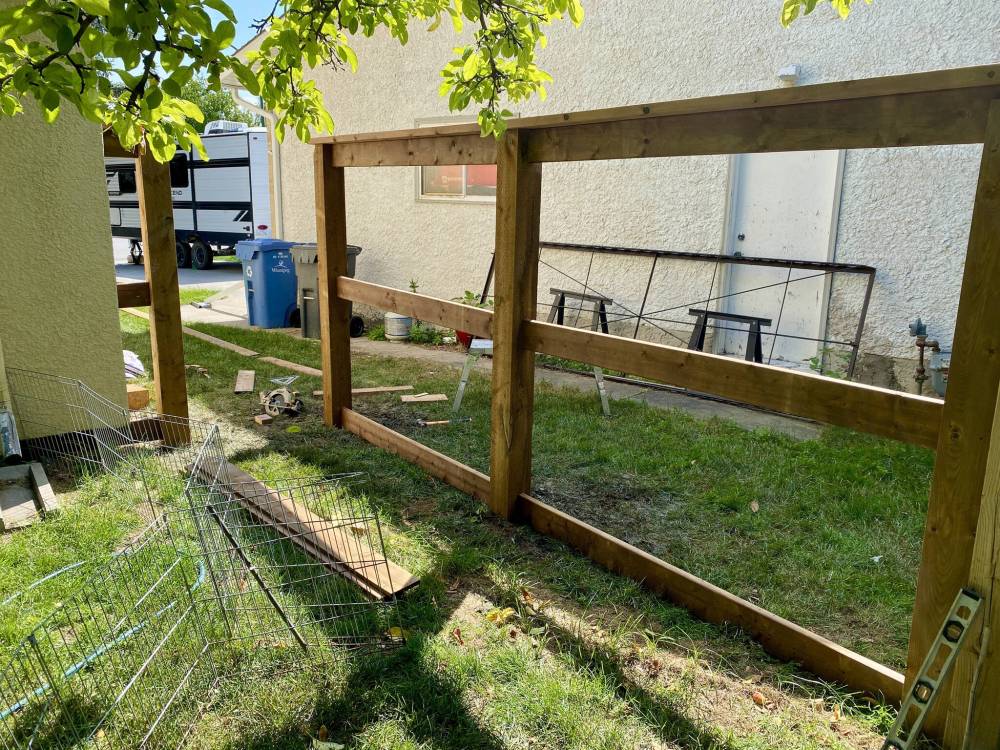
Top, bottom, and middle 2 x 6 horizontal supports are secured between the 6 x 6 posts.
This short fence will surely go a long way towards ensuring peaceful days on the deck.
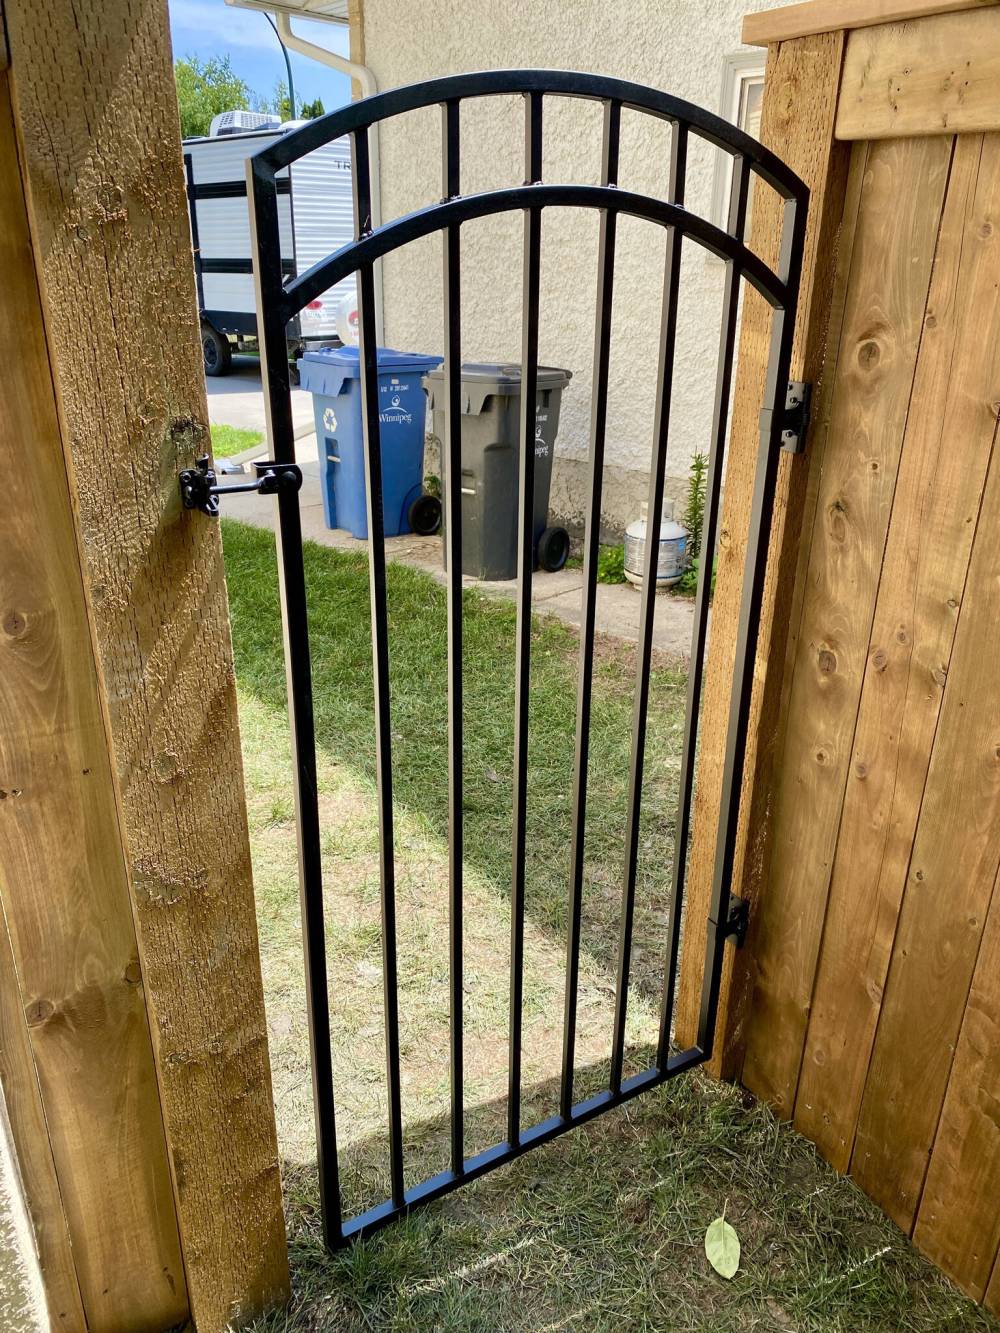
A pre-fab iron gate lets the family dog see all the action from the safety of the backyard.