

Picture-perfect porch
Homeowners’ vision brought to live with new decking, aluminum railings
Advertisement
Read this article for free:
or
Already have an account? Log in here »
To continue reading, please subscribe:
Monthly Digital Subscription
$1 per week for 24 weeks*
- Enjoy unlimited reading on winnipegfreepress.com
- Read the E-Edition, our digital replica newspaper
- Access News Break, our award-winning app
- Play interactive puzzles
*Billed as $4.00 plus GST every four weeks. After 24 weeks, price increases to the regular rate of $19.00 plus GST every four weeks. Offer available to new and qualified returning subscribers only. Cancel any time.
Monthly Digital Subscription
$4.75/week*
- Enjoy unlimited reading on winnipegfreepress.com
- Read the E-Edition, our digital replica newspaper
- Access News Break, our award-winning app
- Play interactive puzzles
*Billed as $19 plus GST every four weeks. Cancel any time.
To continue reading, please subscribe:
Add Winnipeg Free Press access to your Brandon Sun subscription for only
$1 for the first 4 weeks*
*$1 will be added to your next bill. After your 4 weeks access is complete your rate will increase by $0.00 a X percent off the regular rate.
Read unlimited articles for free today:
or
Already have an account? Log in here »
In the beginning of my career as a builder and renovator, my focus was to fill my calendar with work, period.
The early years were primarily filled with back-to-back interior projects, allowing me to build decks on weekends. Nowadays, I’ve reclaimed my weekends and my build schedule is divided into two seasons: interiors from October until June, and exterior projects during the warmer months.
Last week, after wrapping up the latest interior work, I was able to complete my first exterior project — and boy, was it ever nice to get back to the outdoors.
MARC LABOSSIERE / FREE PRESS
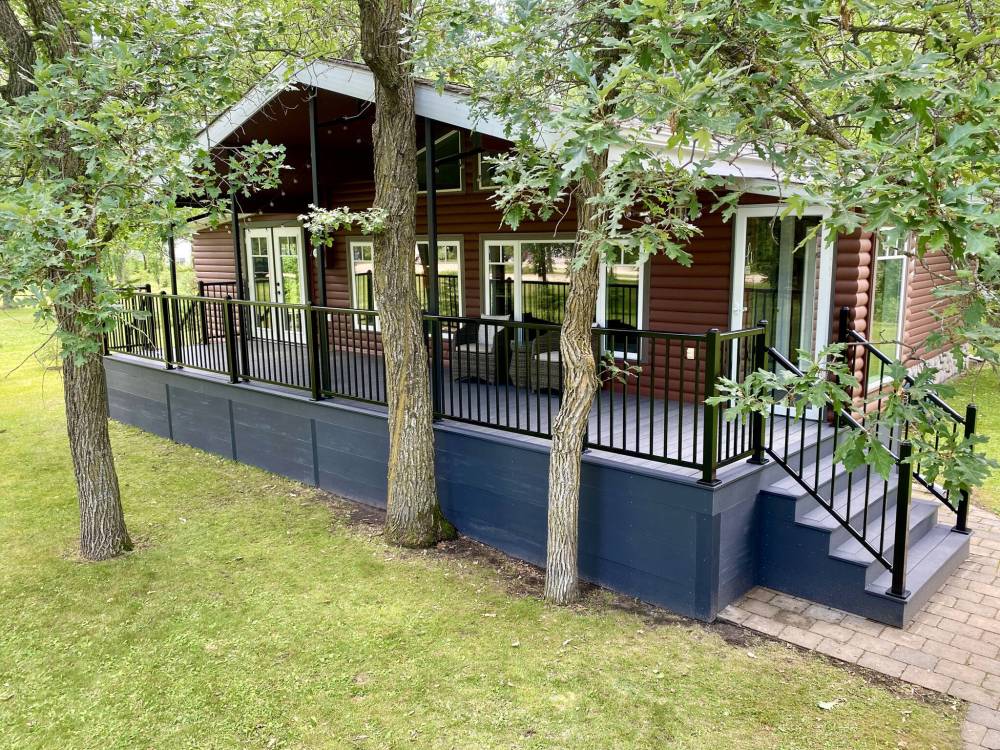
The old lumber tops and skirt were removed from this covered front porch and replaced with two-tone composite decking and aluminum railings.
The project involved updating an existing 36-foot long by 8-foot deep covered front porch, which entailed replacing the old, weathered lumber decking, railings and unsightly lattice skirt with new two-tone composite decking, fascia and black aluminum railings — an enhancement the homeowners had dreamed about for several years. Once the colours of composite were chosen, the process got underway.
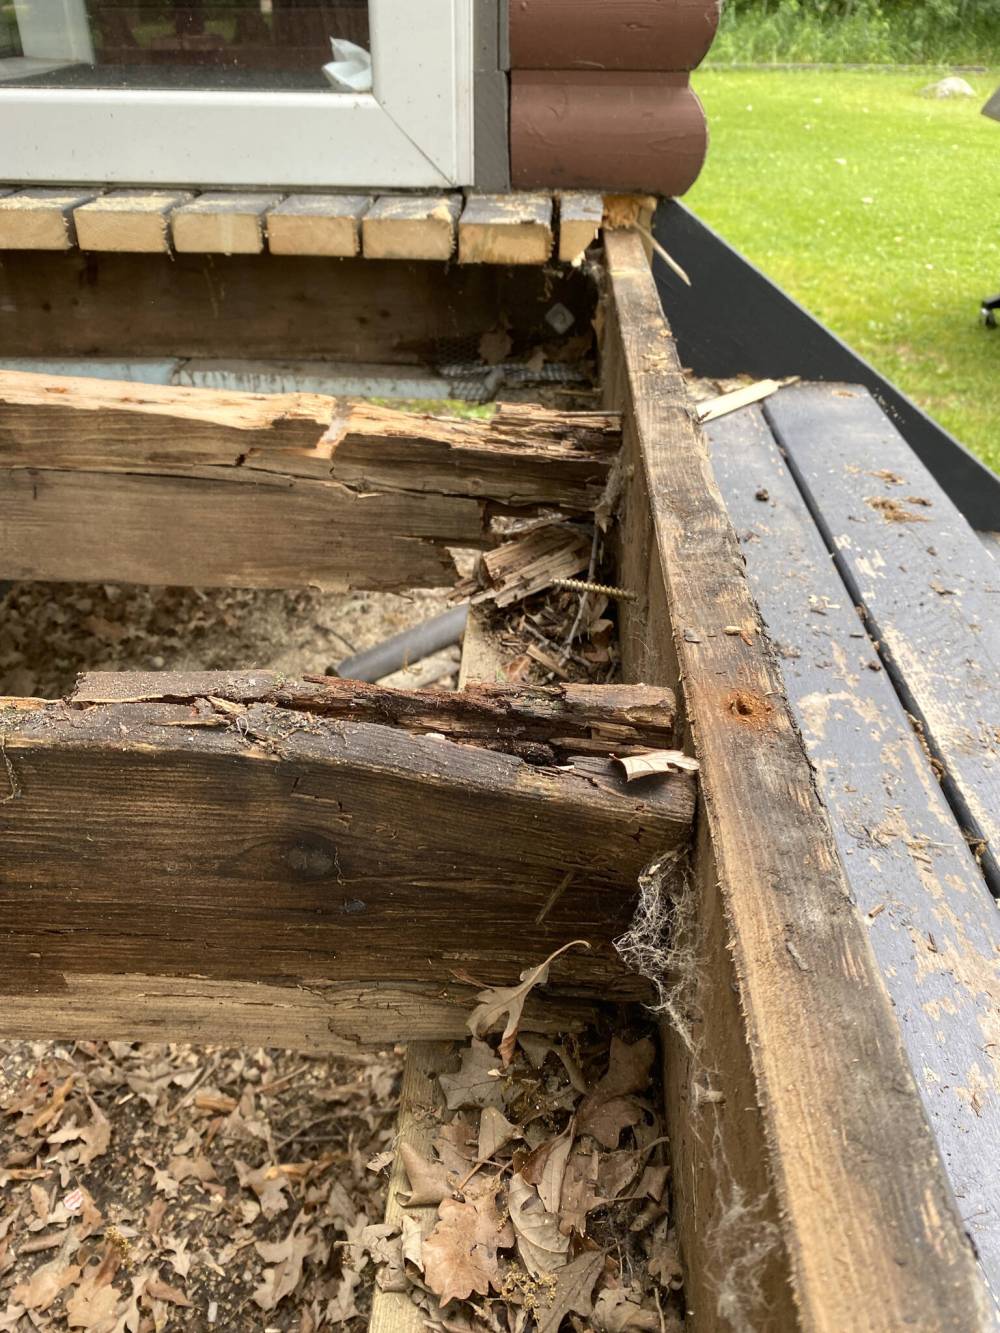
The old lumber top decking consisted of 2 x 4s set perpendicularly from the front face of the house, which meant the joists ran parallel atop beams that protruded from the front of the house. Once the 2 x 4 tops were removed — using a three-foot crowbar to pry up boards that had been nailed long ago — and the framing was revealed, it became apparent that a few of the joists would need to be replaced due to rot. Those joists were updated and every existing beam was levelled and secured.
To accommodate composite top-decking, joists must usually be set no more than 16 inches apart, and fortunately, these joist were 16 inches on centre. Then the perimeter had to be constructed to accommodate a composite border, with picture-framing mitered at all corners.
As such, the appropriate lumber adjustments were made to the existing framework. Lastly, both staircases were completely reframed using new treated lumber. This was the easier path, due to the picture-frame aspect of each stair, which again requires a specific layout of individual stair stringers.
Once the main framing was completed, vertical boards were added along the underside of the entire perimeter of the deck upon which the composite fascia could then be attached. I like to start with the fascia when installing composite.
MARC LABOSSIERE / FREE PRESS
A few rotted joists had to be replaced before the facelift project could begin.
The porch design includes five iron supports for the gable roofline. With this layout in mind, a creative fascia layout was established to complement the array of supports. Once the immediate area below the top surface was sheathed along the perimeter, vertical fascia was installed along all inner and outer corners of the skirt, as well as at the five areas below the roof supports, creating decorative quadrants once the sections were filled with horizontal planks. The stair risers were then fitted with fascia cut down to the proper height using a table saw. The verticals adjacent to the house were jigged to meet the idiosyncrasies of the rounded pine and stone face siding, and a small access door behind and below the main entry door was fitted with hardware to provide easy access below deck.
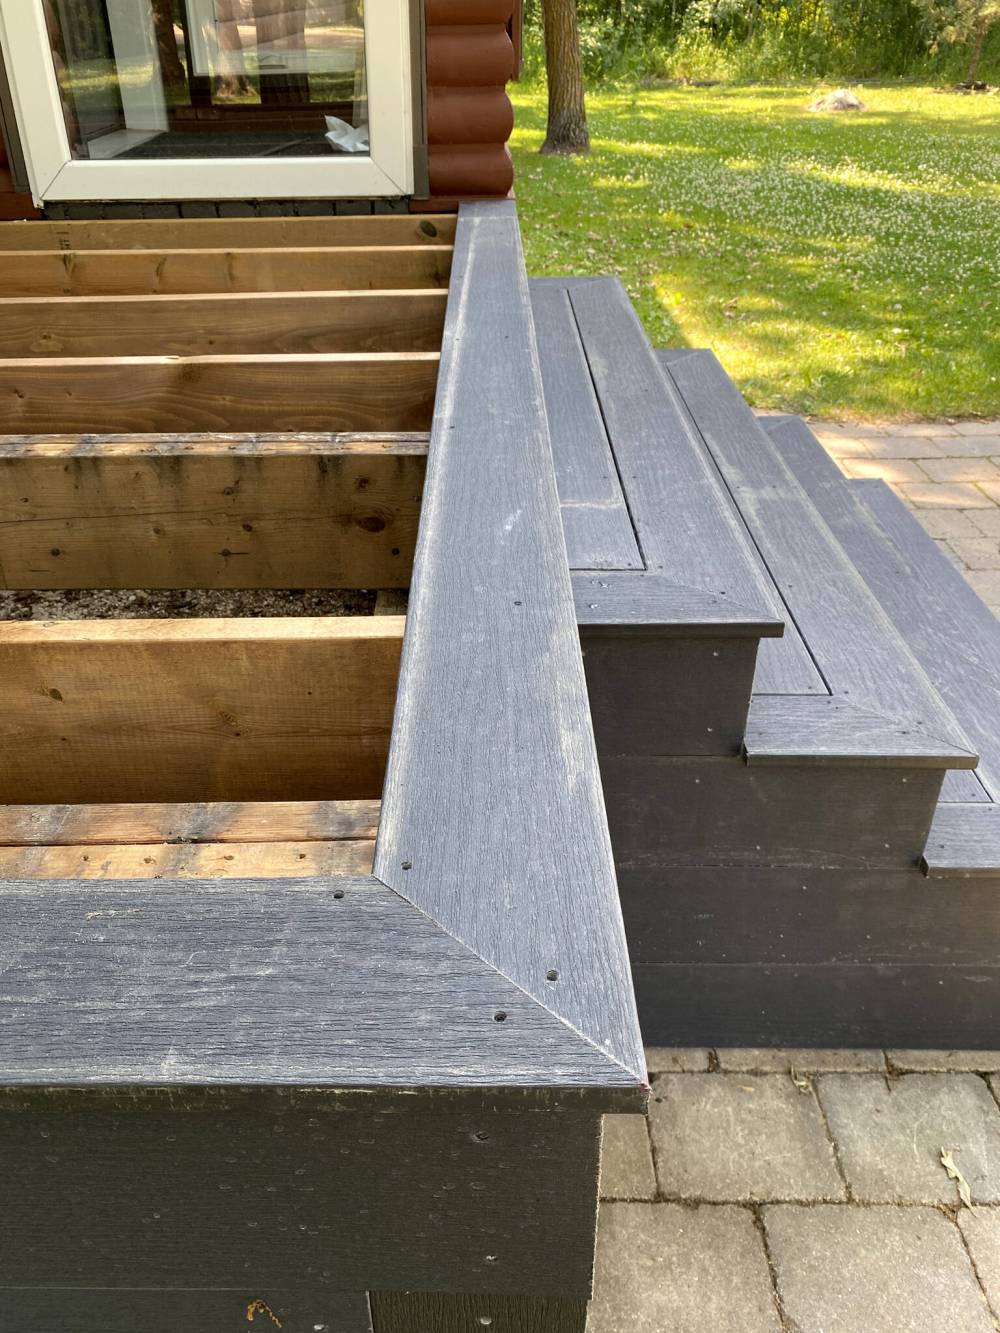
With the fascia in place, the stairs were tackled. Using squared-edge composite top decking, every stair received a picture-framed perimeter layout, with one single board dropped in. The topside of the main deck then received the same picture-framing. The fascia, stairs and main perimeter of the deck are a beautifully bold dark-slate colour, which outlines the lighter grey of the inner grooved composite boards that make up most of the top decking surface.
Starting at one end, the boards were cut to the proper length and secured to the joists using the hideaway clips provided. Every so often, back measuring was required to ensure the boards were being secured parallel to each other.
On this porch, the back side nearest the house front was a bit shorter than the outer side. As a result, slight adjustments were made as the top decking boards were set into place.
Constant re-measuring ensured that once the final boards were being placed there would not be a sliver of a board required to fill the area within the main picture-framing.
MARC LABOSSIERE / FREE PRESS
Picture-framing composite was installed in preparation for the top-decking boards.
As the top-deck installation was almost complete, the final board needed an inch taken off, which is hardly noticeable in the grand scheme of things.

With the composite fully installed, the black aluminum railing was configured by first setting the posts at every corner in a pattern that matched the existing roof supports. The top and bottom railing horizontal supports were then placed into the post brackets, and aluminum pickets were installed, culminating in a vast improvement in both functionality and esthetics, which greatly increases the curb-appeal of this beautiful home.
It was clear from the outset that the homeowners had a vision, and it’s satisfying to know the results have surpassed their expectations.
There’s no better feeling than when clients are overjoyed with a completed project. It’s a feel-good moment for everyone involved.
And, most importantly from my perspective, it was a great way to kick off the exterior builds season, under a warm sun and breathing fresh outdoor air.
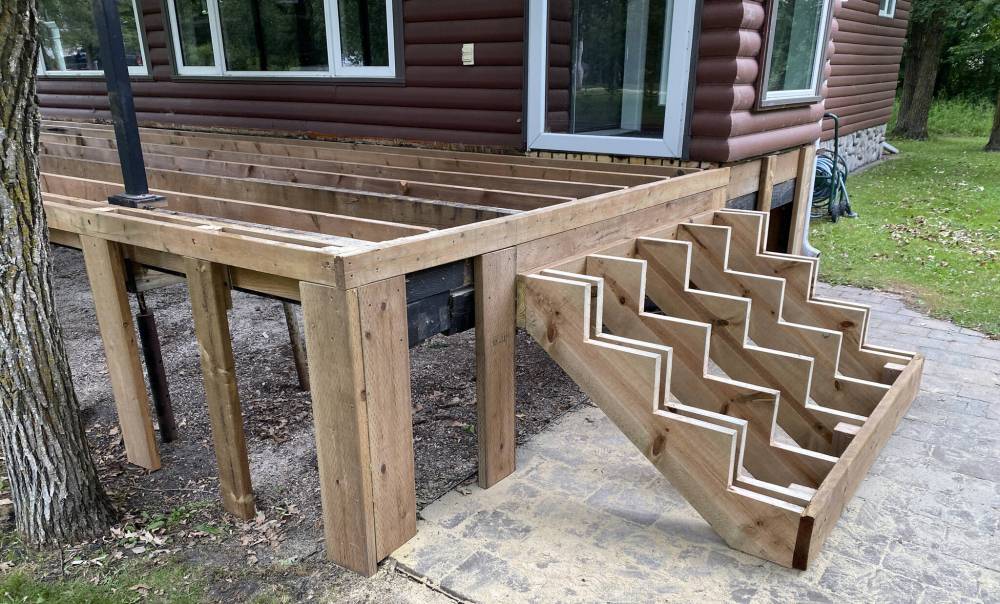
Framing for the stairs.

MARC LABOSSIERE / FREE PRESS
The dark slate perimeter picture-framing and skirt complement the lighter grey main deck boards.